
 Harvey Carpenter
 In this guide, we’ll show you how to create a high-performing, conversion rate optimised form in just a few minutes. We’ll walk through the most important features in the context of creating a form for a dental practice.
1 – Create a form and choose a template
Once you’re logged into Growform, hit “Create new form”, choose a high performing template and tell us how much a lead is worth for reporting. Click “Create form” when you’re ready:

There are currently 10+ forms to choose from, each having been designed according to the latest CRO (conversion rate optimisation) principles and research.
Even if you’re not designing a form closely related to one of our templates, go ahead and choose a template to get started with.
2 – Navigate between steps using the step navigation buttons
Use the step navigation buttons at the top of the page to move between steps (you’ll notice buttons within the form are disabled to prevent confusion!):
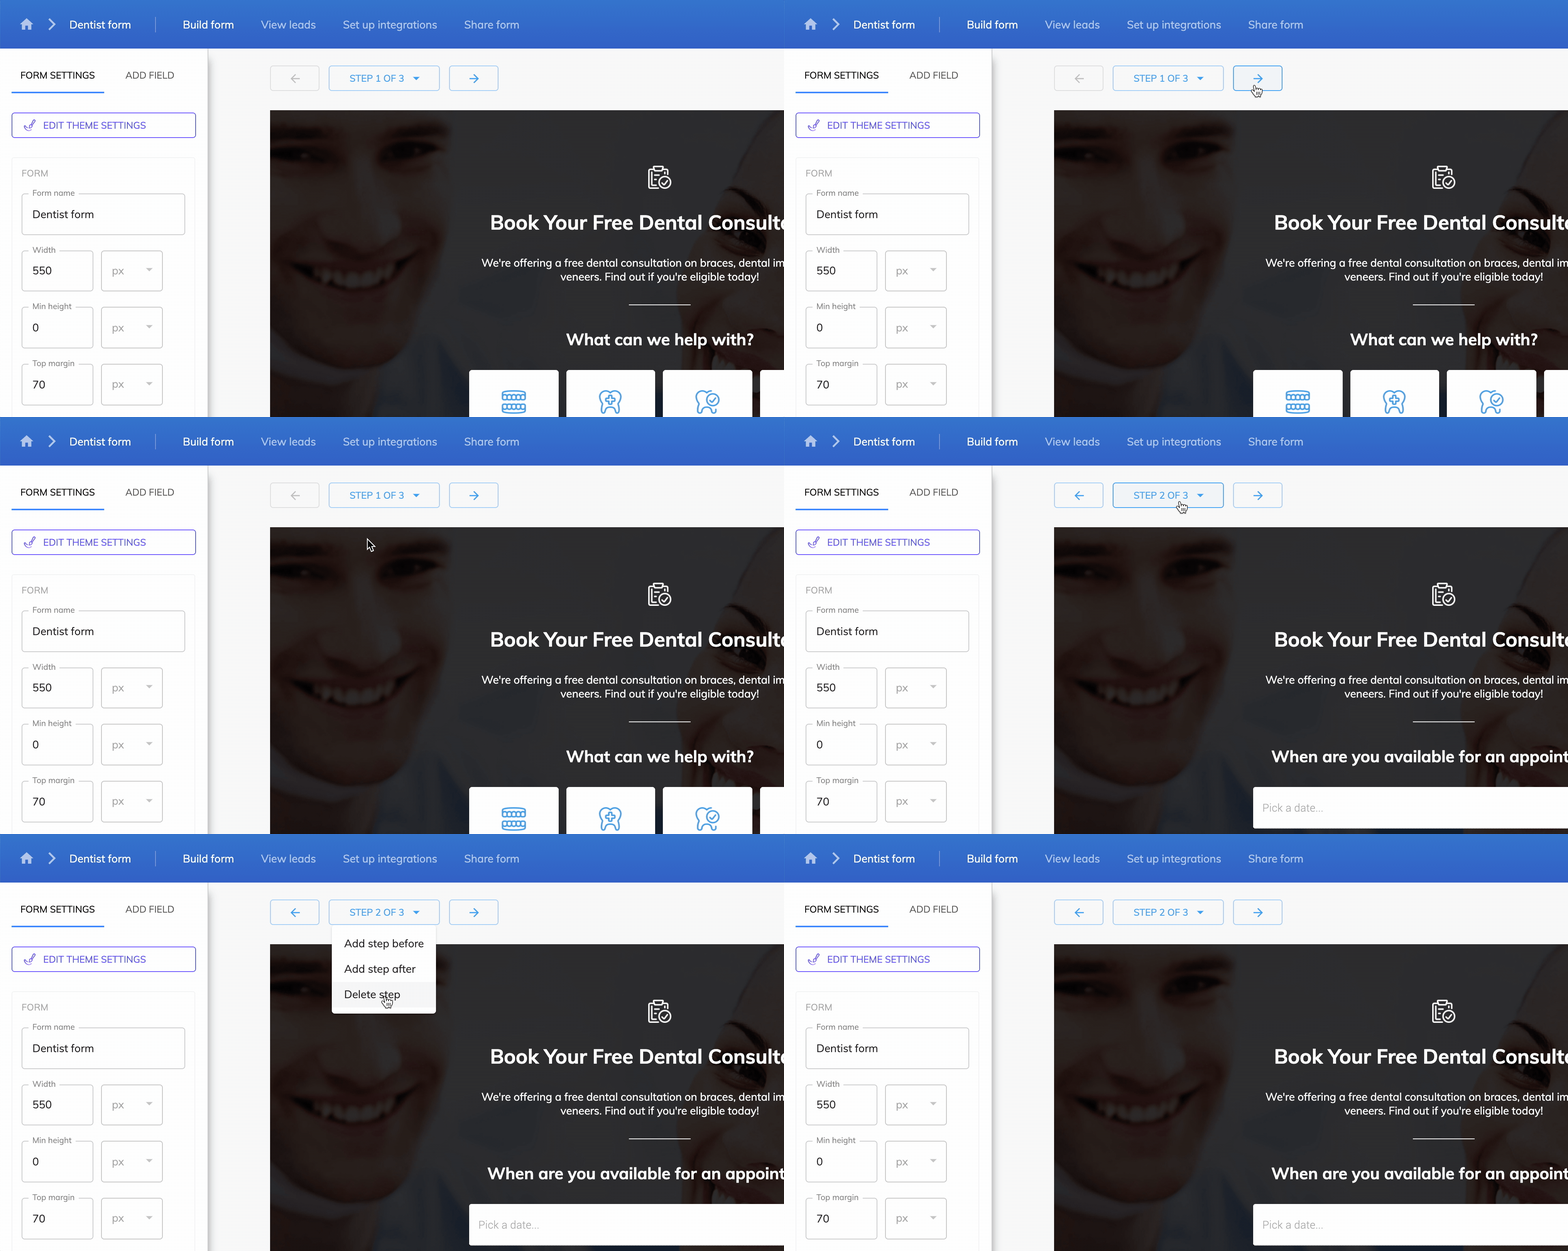
You can also use the dropdown to add and delete steps.
3 – Add a new single select field
To add a new field, hit “Add field” in the toolbar on the left side of the page. Then, choose “single select” from the list:
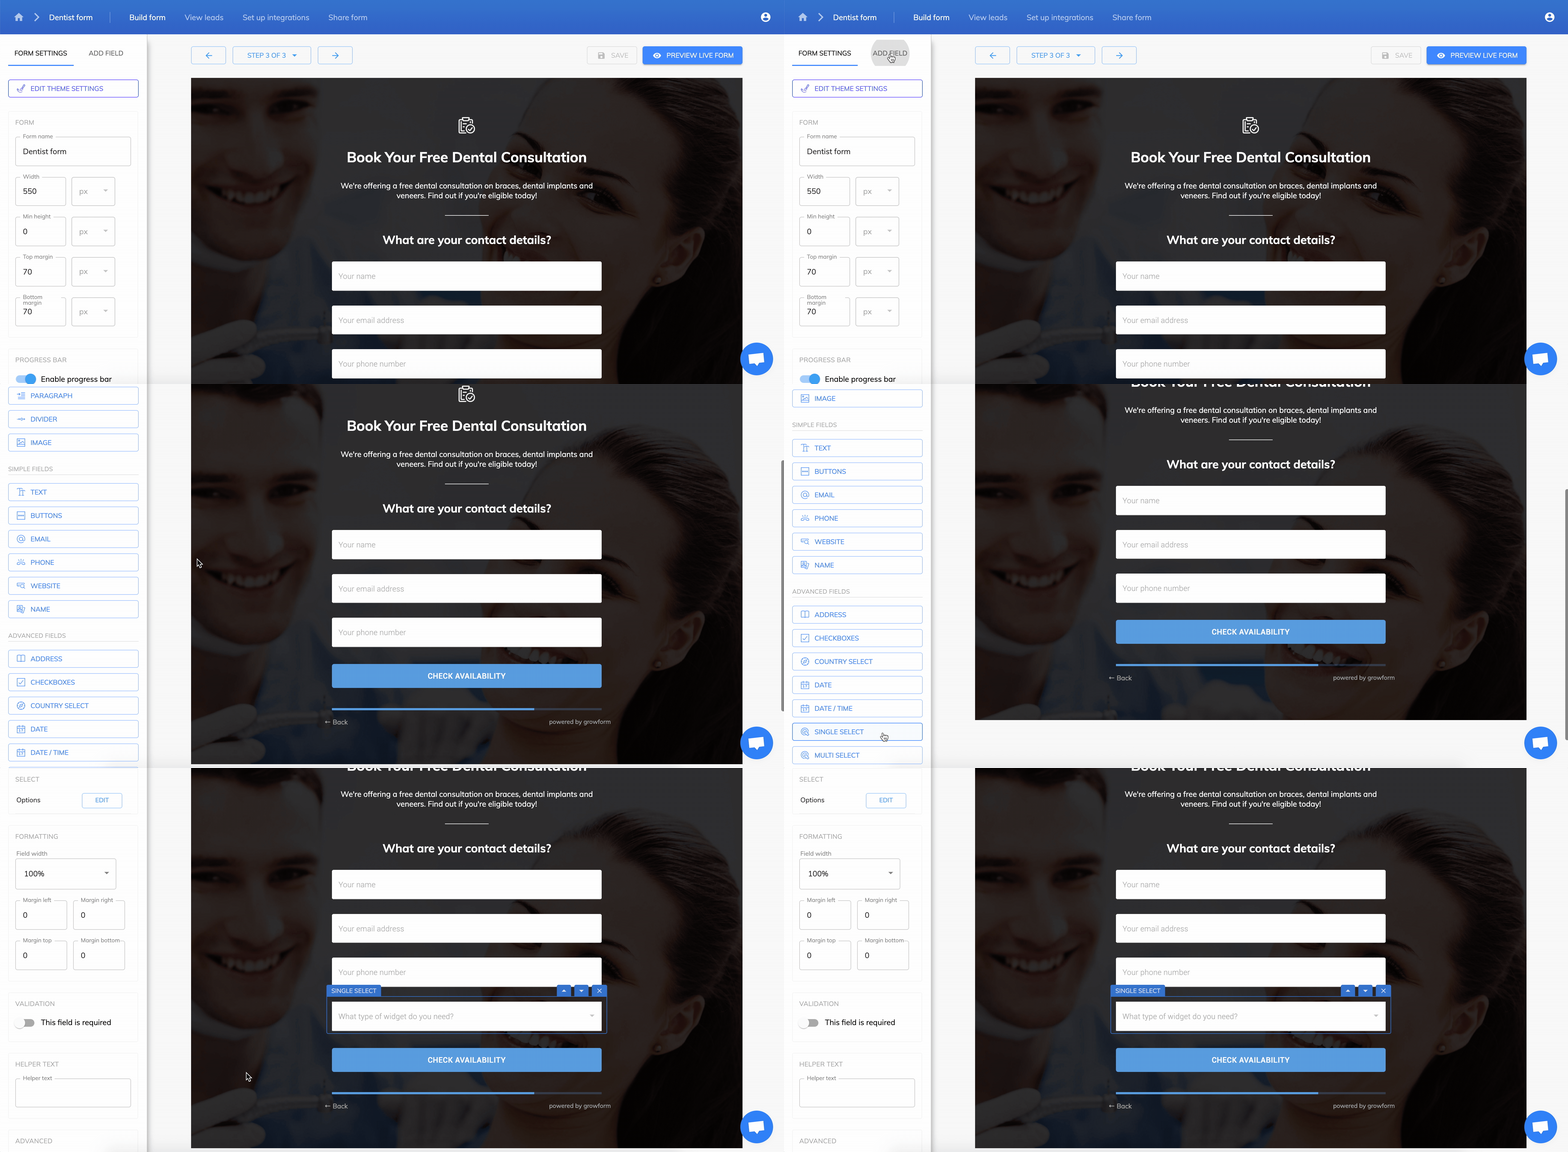
4 – Edit the single select field to suit your needs
Change the label text under the “label” header in the left-hand panel. In this example, we’re changing it to “What time is best to call you?”
Then, click the “Edit” button next to “Options” and adjust the options as desired – in this example, we’ll change the options to “Morning”, “Afternoon” and “Evening”:

When you’re done, hit “Save” to save and publish your changes.
5 – Add some text to be shown on every step
If you wish to add some text to the top of every step of your form, you can move it up to the header. Most forms come with text already in the header.
In this example, we’ll create a new paragraph element and change the text to “Don’t forget to ask about our Halloween discounts!”
We’ll then use the reorder arrows to move it up to the header:
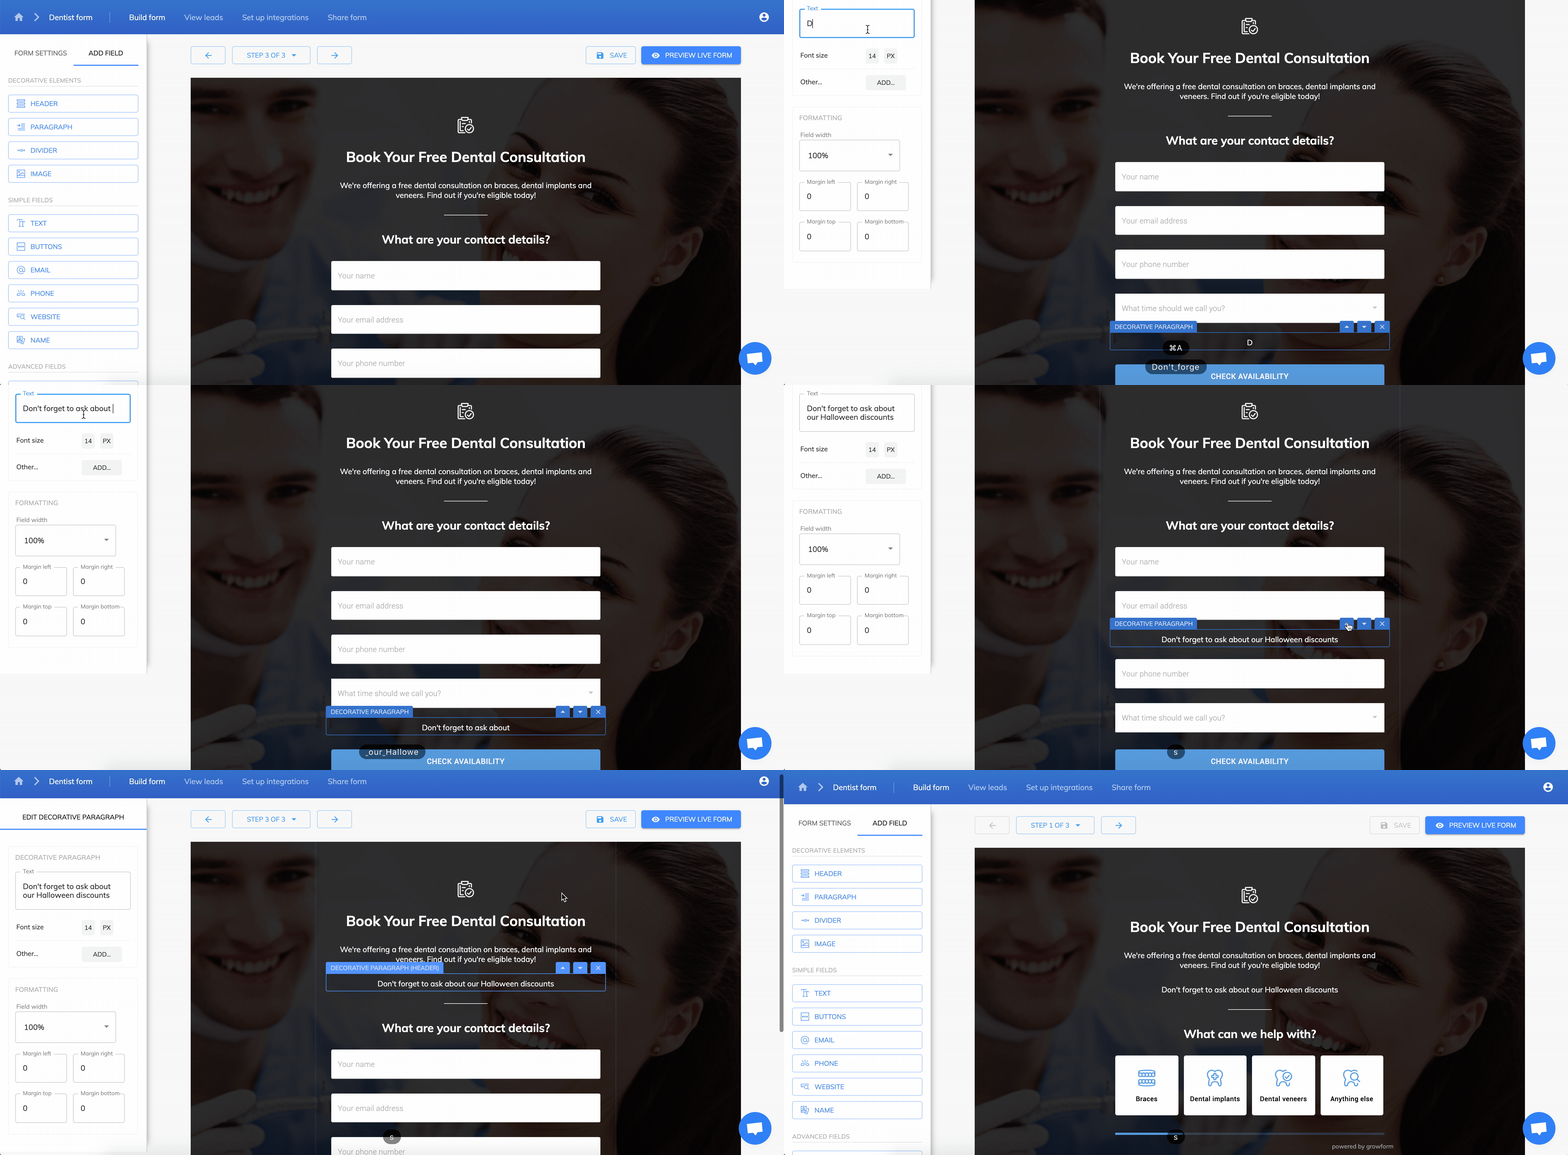
6 – Edit the buttons
Buttons are the ideal, low-friction way to start your form. Almost every Growform template starts with buttons for this reason.
If you wish, you can adjust the heights, number of buttons per line and add images to allow for various different configurations:

To learn more about configuring buttons and the different styles you can achieve, read our guide – 4 different button styles you can create with Growform.
7 – Embed or share your form
When your form is ready, hit “Save” to save your changes and then “Share form” on the top menu bar.
Choose one of the embed options and follow the instructions.
We usually recommend embedding the form into your website or having the form appear when a button is pressed (eg. “get quote”).
You can read more about the options in our guide – 3 ways to embed your form with Growform.
8 – Let the responses roll in!
You’ll receive email notifications whenever you receive a form submission by default.
For more advanced options such as text message notifications, adding rows to Google sheets or multiple email recipients – guide to using Zapier with Growform.
Related articles

Growform Mass Tort Intake Forms for Better Screening
Growform helps mass tort marketers and intake teams turn paid traffic into better-screened claimant leads.
September 30, 2026

Growform Debt Relief Forms for Qualified Lead Intake
Debt relief lead forms have to do more than convert.
September 30, 2026

Growform CRM Forms With Hidden Field Pass-Through Built In
September 30, 2026