Cómo agregar un formulario Growform de varios pasos a Unbounce (método de superposición)
This post shows you how to add a multi-step form to your Unbounce page as an overlay – i.e. how to get a form to “pop up” when somebody clicks a button:
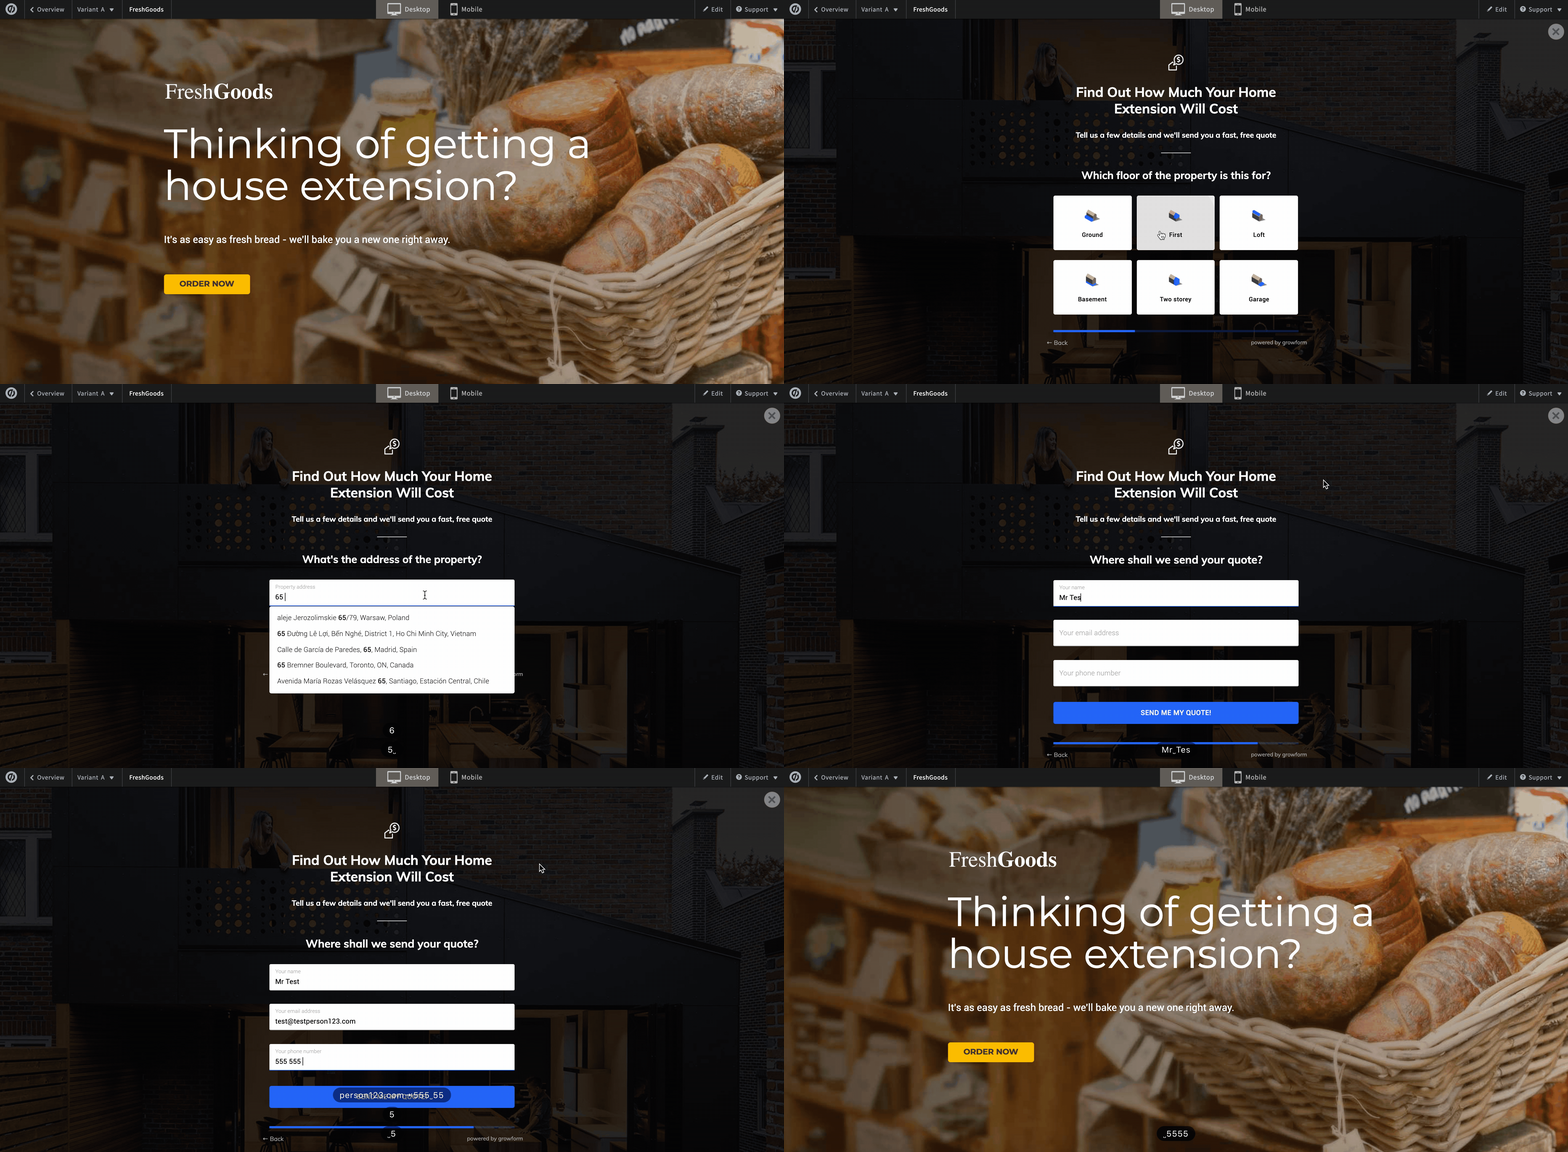
The overlay method is a nice way to avoid overwhelming your visitors when they first see your form.
If you want to embed a multi step form directly on the page, you’re in the wrong place, and should head to this guide.
Tabla de contenidos
1 – Create a form on Growform
It almost goes without saying that you’ll need to set up a form on Growform. We have a 14 day free trial (with no credit card required) – you can sign up here.
Follow our getting started guide if you need help creating your first form.
The first step will look something like this:
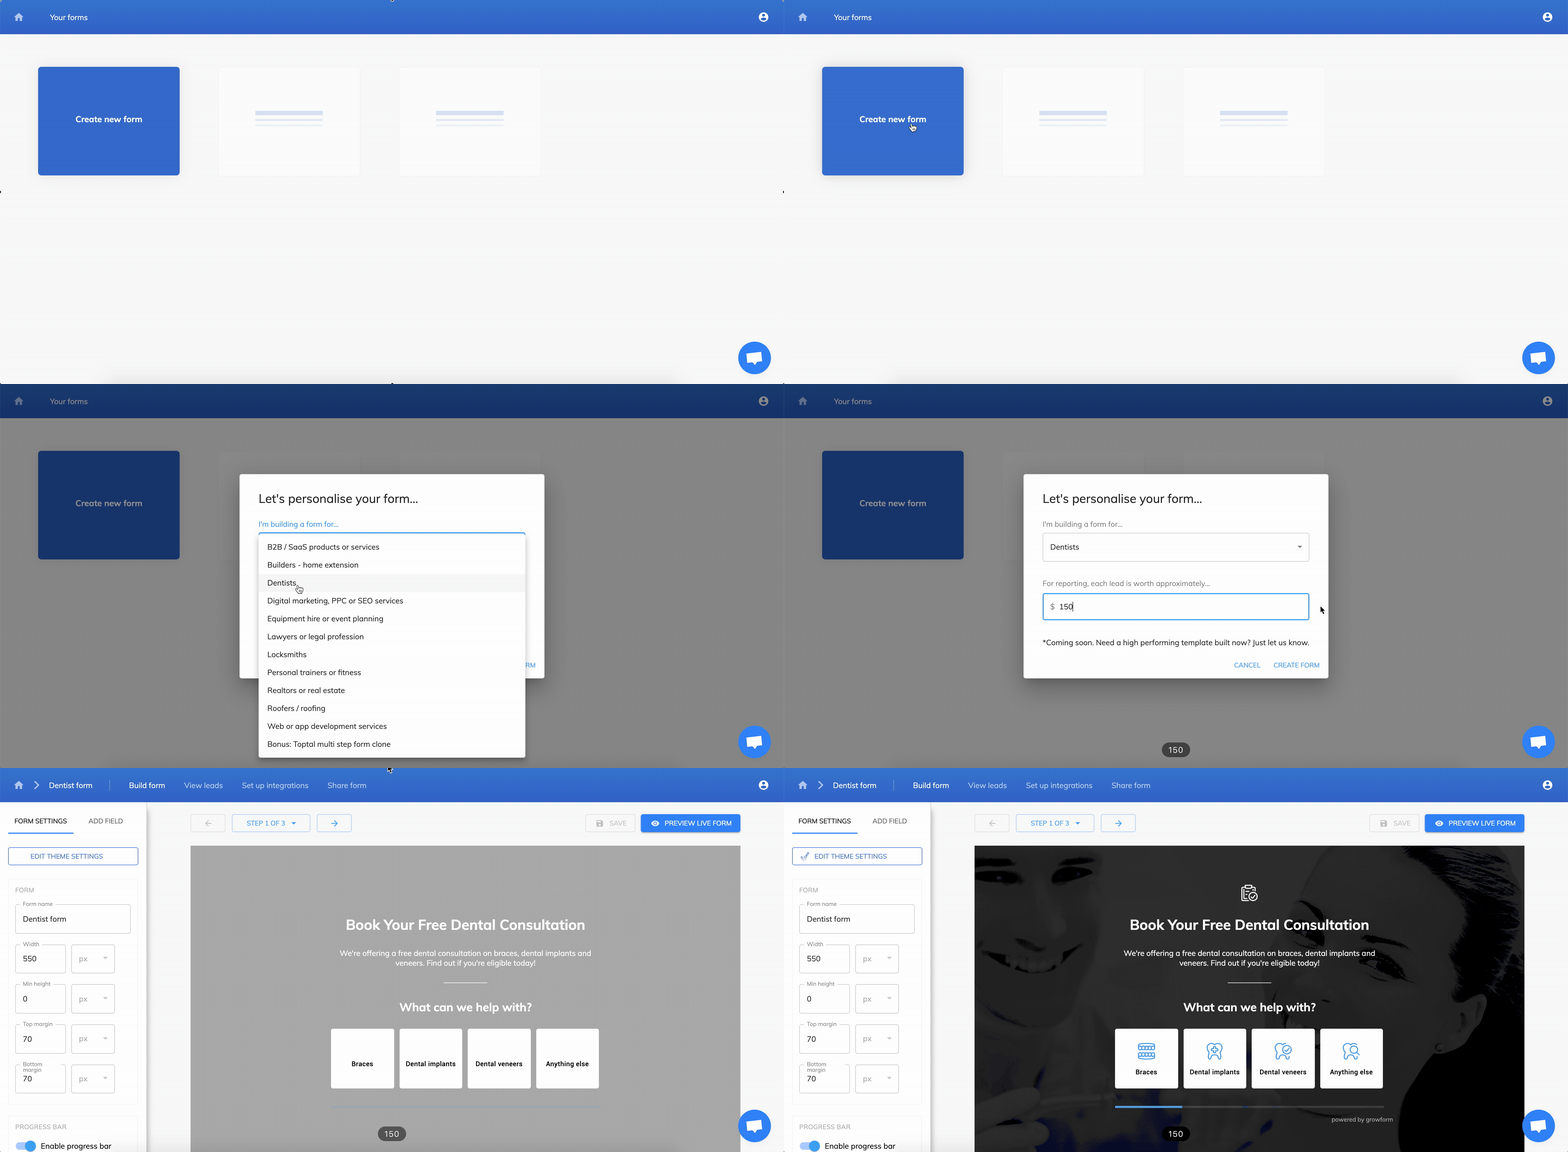
Follow our getting started guide if you need help creating your first form.
2 – Get your Growform share code
To get your Growform share code, open Growform and make sure your form is saved. Then, navigate to “Share form” in the top blue bar.
Choose the second option – “Show Growform as a modal when your users click something on your website”.
Click the code and copy it to your clipboard.
3 – Find your Unbounce trigger button and give it a custom class name
In Unbounce, find the button you wish to use as a “trigger” in Unbounce and click it (whilst in the editor) to reveal the properties panel.
Find “class” under “Element metadata” and enter any class name you wish – let’s call it “growformTrigger”:
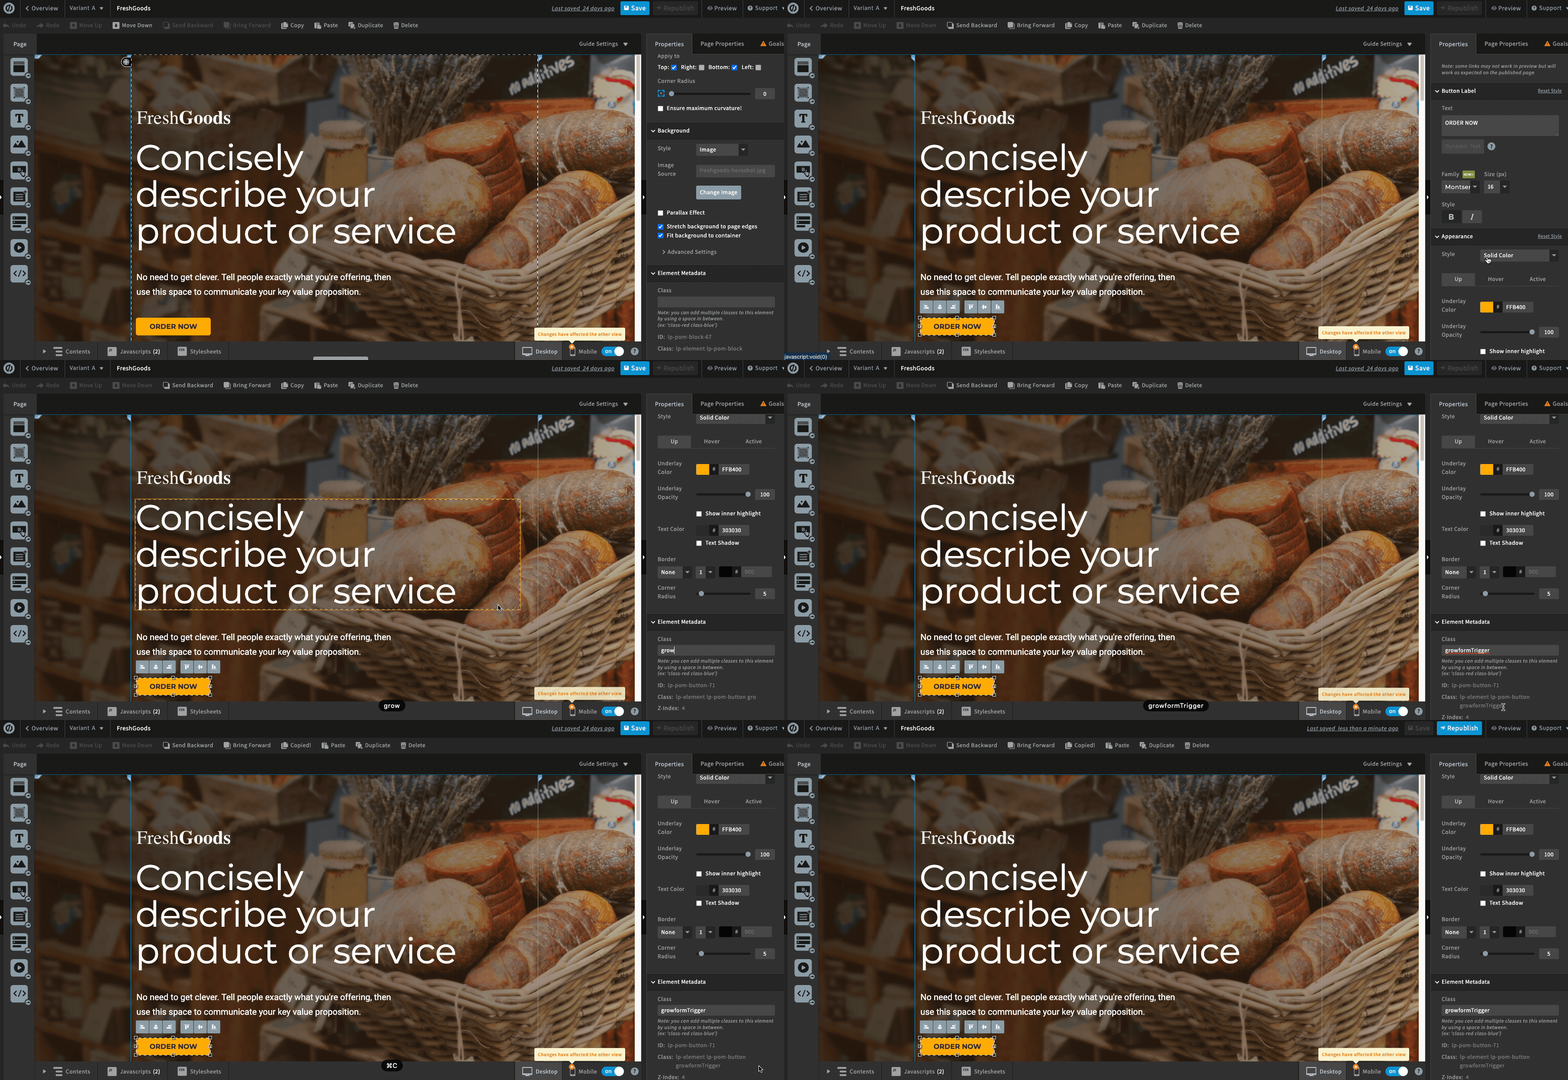
Take a note of your class name – you’ll need it in the coming steps.
Don’t forget to save your Unbounce page and do the same for mobile view.
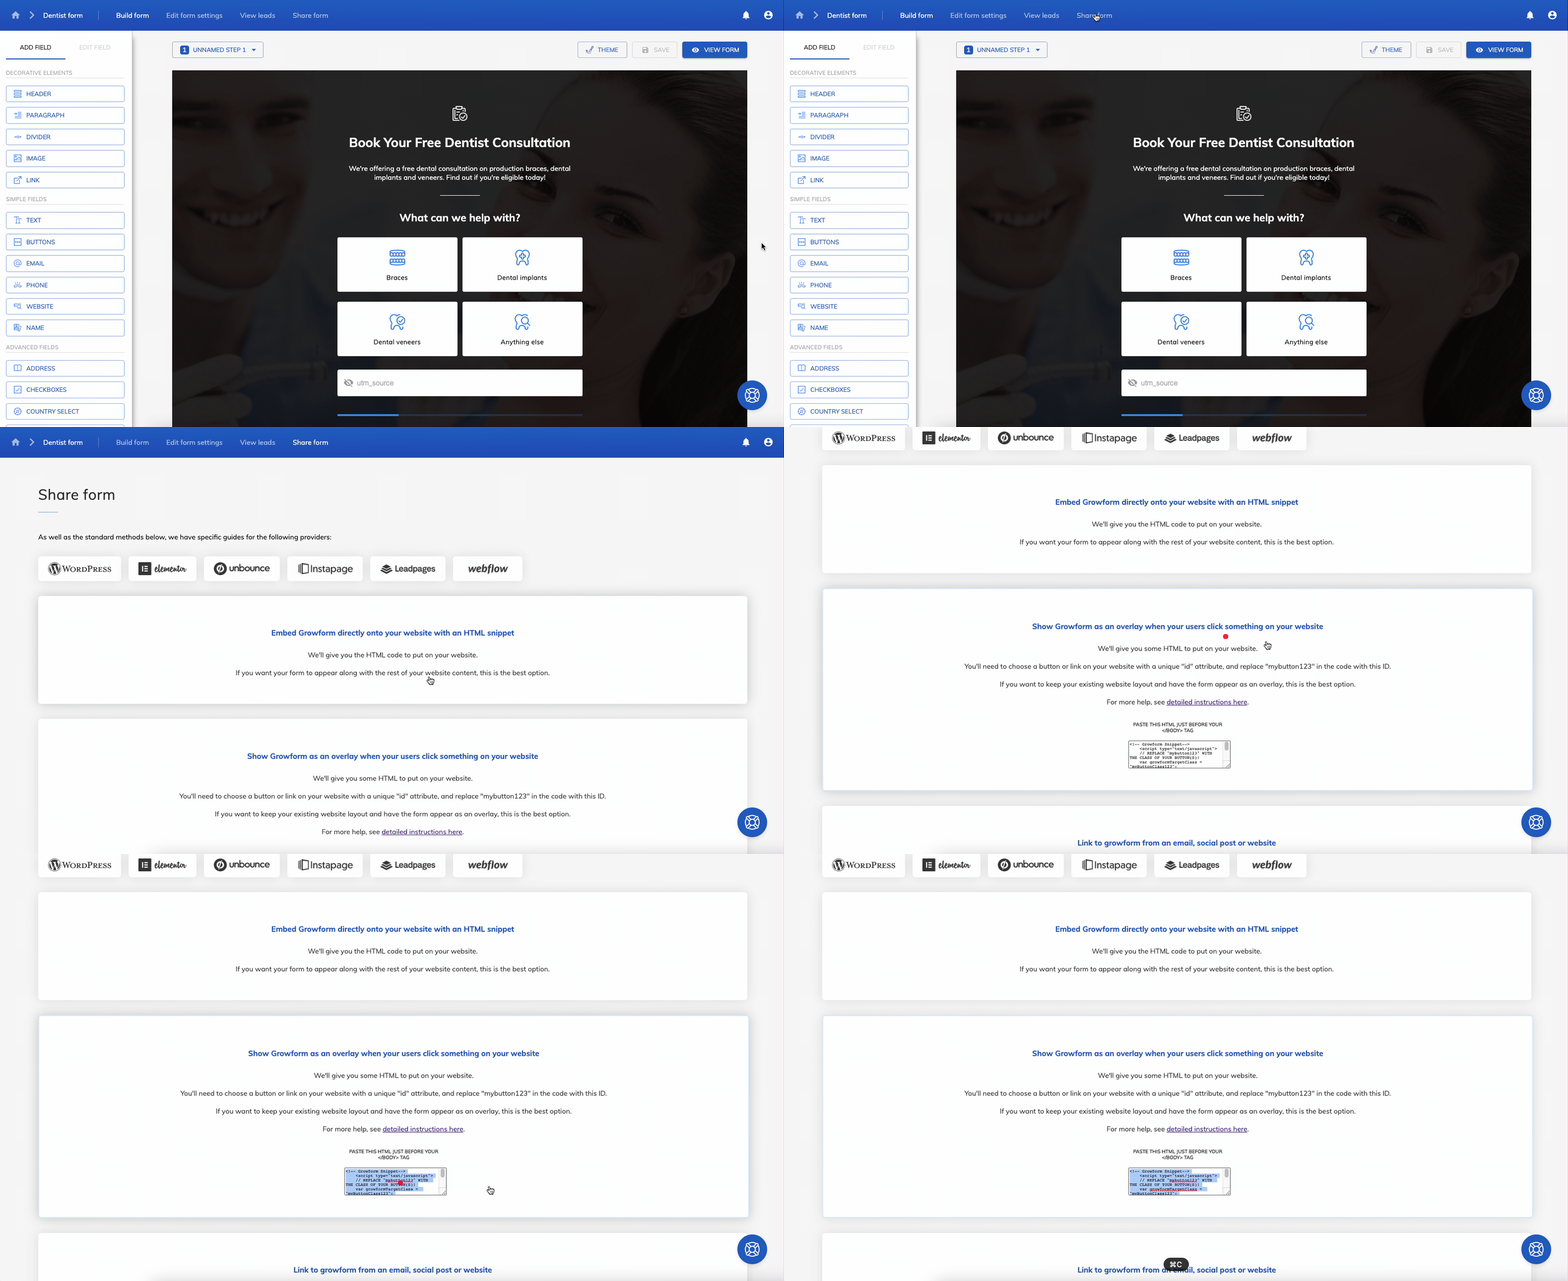
4 – Get your Growform share code
To get your Growform share code, open Growform and make sure your form is saved. Then, navigate to “Share form” in the top blue bar.
Choose the second option – “Show Growform as a modal when your users click something on your website”.
Click the code and copy it to your clipboard:
5 – Paste your code into Unbounce‘s JavaScript area
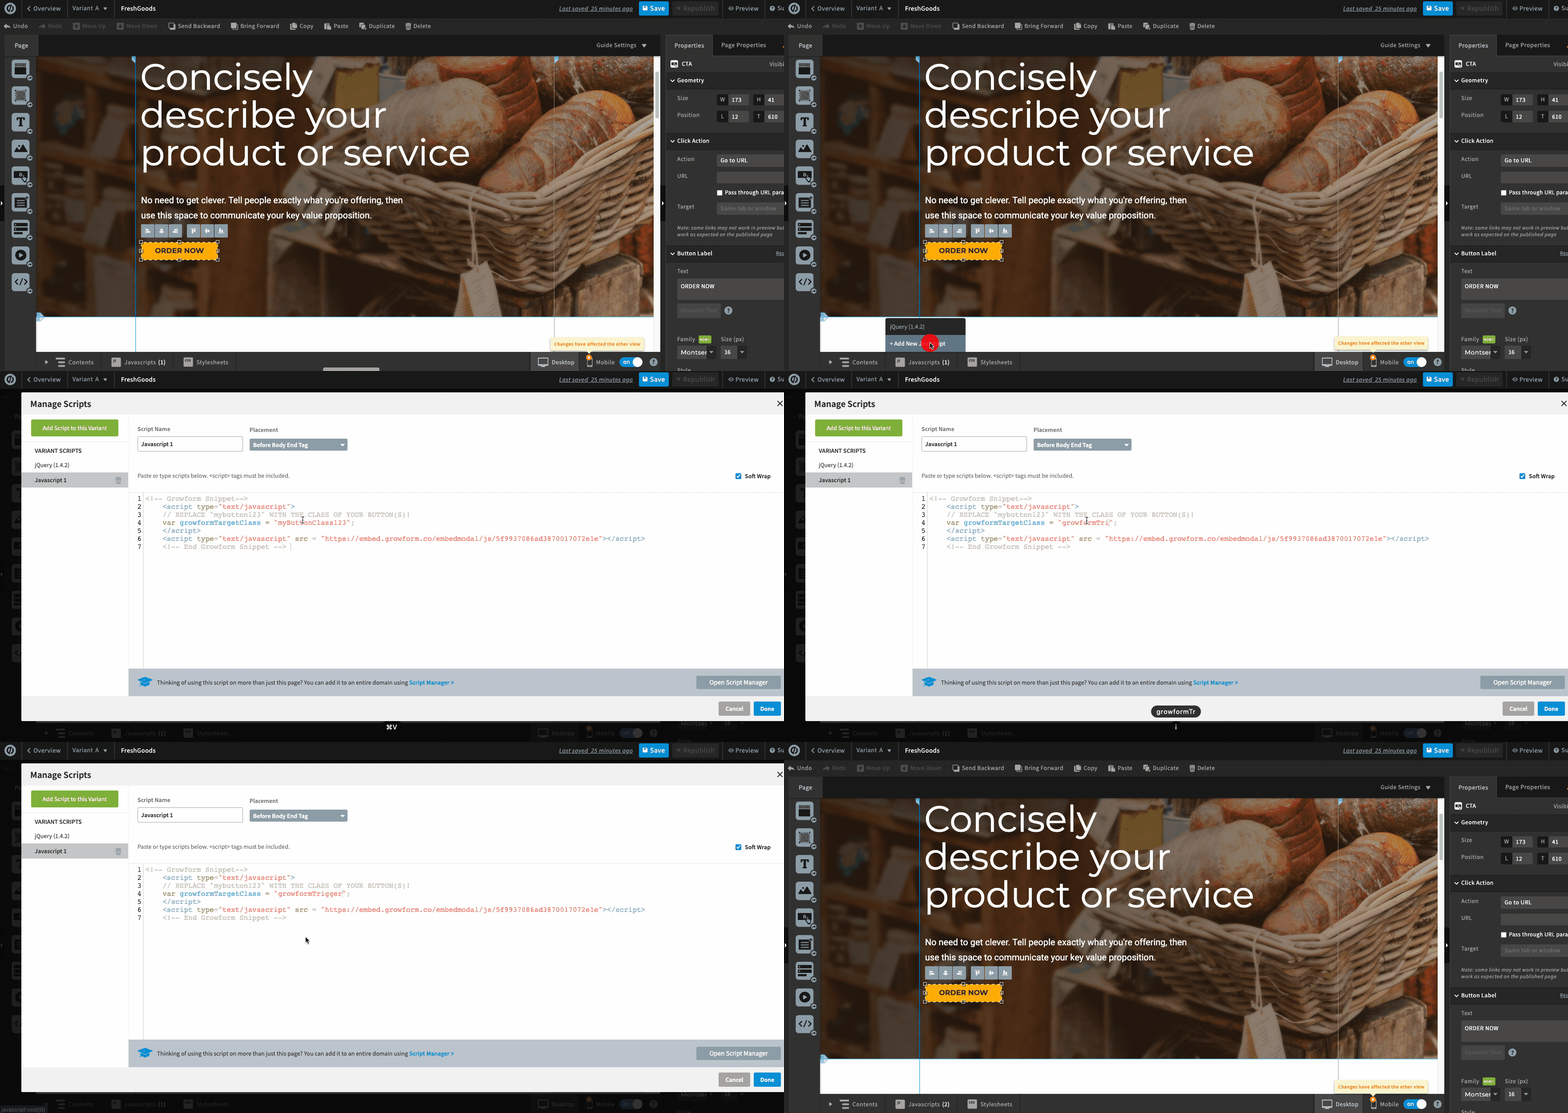
Click “Javascripts” at the bottom of the Unbounce editor and then “Add new Javascript”.
Ensure “Before body end tag” is selected under “Placement”.
Paste the code you copied in step 3 into the box.
Finally, replace the growformTargetClass on line 4 (“myButtonClass123”) with the class name you copied in step 2 (in this example’s case, “growformTrigger”).
This is vital so Growform knows to trigger the modal when somebody clicks your Unbounce button.
Hit “Done” and then save and view your changes:
6 – Check out your new Unbounce multi-step form!
Hit the button you chose in preview (or live) mode to see your new multi-step form in Unbounce:

Need more? We’re actively working on our Unbounce offering, including the ability to see leads appear in Unbounce.
Please get in touch with us to provide feedback and help us shape the roadmap.
Recent Posts
- 6 Buenas prácticas esenciales en el diseño de formularios móviles para aumentar las conversiones
- Repasamos las mejores herramientas de generación de prospectos B2B para potenciar tus campañas
- Precios de Typeform: Descubre los costes ocultos y una alternativa mejor
- Cómo optimizar la puntuación de clientes potenciales B2B para acelerar el cierre de ventas
- Éstas son las mejores alternativas a los formularios de Google para una recogida de datos más eficaz
Categories
- Conformidad
- Convertri
- CRO
- Diseño de formularios
- Diseño de formularios de varios pasos
- Generación de clientes potenciales
- Google Tag Manager
- Herramientas
- Hubspot
- Inmobiliario
- Integración
- Marketing
- Ofertas especiales de captación de clientes potenciales
- Prospección
- Sin categorizar
- TrustedForm
- Tutoriales
- Tutoriales Unbounce
- Unbounce
- Uso de growform
