Our Ultimate 7-Step Lead Qualification Checklist for Sales Success
Quick Summary
Our ultimate 7-step lead qualification checklist outlines crucial steps, from defining your Ideal Customer Profile and assessing their budgets, to evaluating their needs. Our practical guide empowers sales teams to prioritize high-value qualified leads and increase conversion rates. With Growform’s intelligent forms, you can streamline the lead qualifying process, focusing on the most promising leads for your business.
Don’t Know How to Get Started with Lead Qualification?
When qualifying leads result in up to 50% more revenue opportunities at 33% lower costs, it’s clear that nailing lead qualification is a must. But getting started can be challenging, especially if you’re using resources on unqualified leads for nurturing.
In this Growform guide, we’ll explore 7 essential steps to build a practical lead qualification checklist that identifies high-potential buyers. But first…
Why Listen to Us?
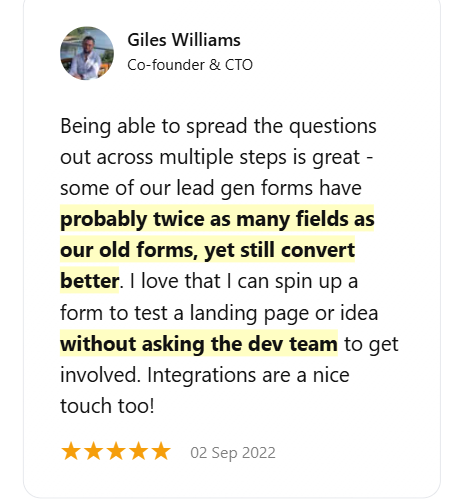
We create high-converting, multi-step forms for industries like finance, real estate, and professional lead generation. Our clients love our intuitive design and smooth integrations— and our forms that consistently boost lead quality.
For instance, we enabled higher conversion rates for our client Giles Williams, allowing for quick testing without developer assistance.
What Is a Lead Qualification Checklist?
A lead qualification checklist is a set of tasks that sales and marketing teams use to evaluate potential customers. It consists of predetermined criteria and questions to see if a lead is suitable for your product or service.
Before creating a lead qualification checklist, classify your leads into:
- Marketing Qualified Leads (MQLs): Leads showing interest but not ready for sales contact.
- Sales Qualified Leads (SQLs): Leads meeting initial criteria and ready for sales engagement.
- Sales Accepted Leads (SALs): Leads sales teams have agreed to pursue.
Why Should You Have a Lead Qualification Checklist?
- Time-Efficient: Streamline the sales process by focusing on quality prospects, saving time and resources with systematic lead evaluation.
- Prioritize High-Value Leads: Rank leads by potential value to optimize efforts.
- Personalized Follow-Up: Enables tailored, targeted follow-up strategies.
- Better Customer Experience: Improves customer experience by addressing specific needs and pain points.
- Systematic Data Collection: Ensures structured collection of vital lead information.
- Identify Sales Opportunities: Detect upselling and cross-selling chances early on.
The Ultimate 7-Step Lead Qualification Checklist
1. Define Your ICP
An Ideal Customer Profile (ICP) is your first step to qualify a lead successfully. When defining your ICP, focus on key firmographic data like company size, industry or annual revenue.
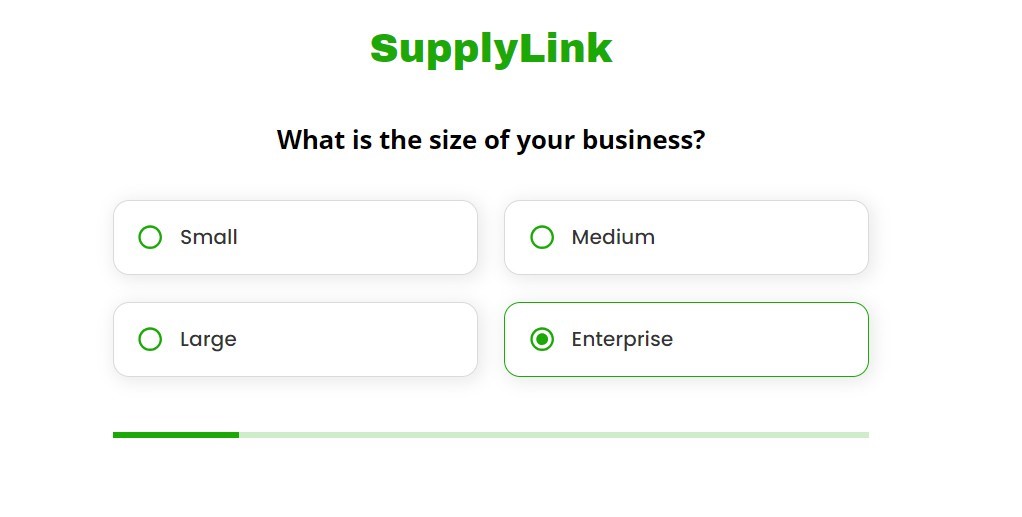
Based on this data, define your ICP by:
- Analyzing your best customers: Pinpoint the shared characteristics of your most successful and profitable clients.
- Gathering data: Talk to your customers, survey them, and dig into CRM insights.
- Identifying patterns: Look for recurring traits and behaviors that distinguish your top customers from others.
Some lead qualification questions to define your ICP:
- “What is your company’s annual revenue?”: Determines if the lead aligns financially with your ICP.
- “What industry does your company operate in?”: Identifies if the lead’s industry matches your product’s target.
2. Gather Contact Information
Now, collect your lead’s contact information to assess their qualification potential. Our multi-step forms break information into manageable steps, boosting completion rates and data quality while minimizing user fatigue.
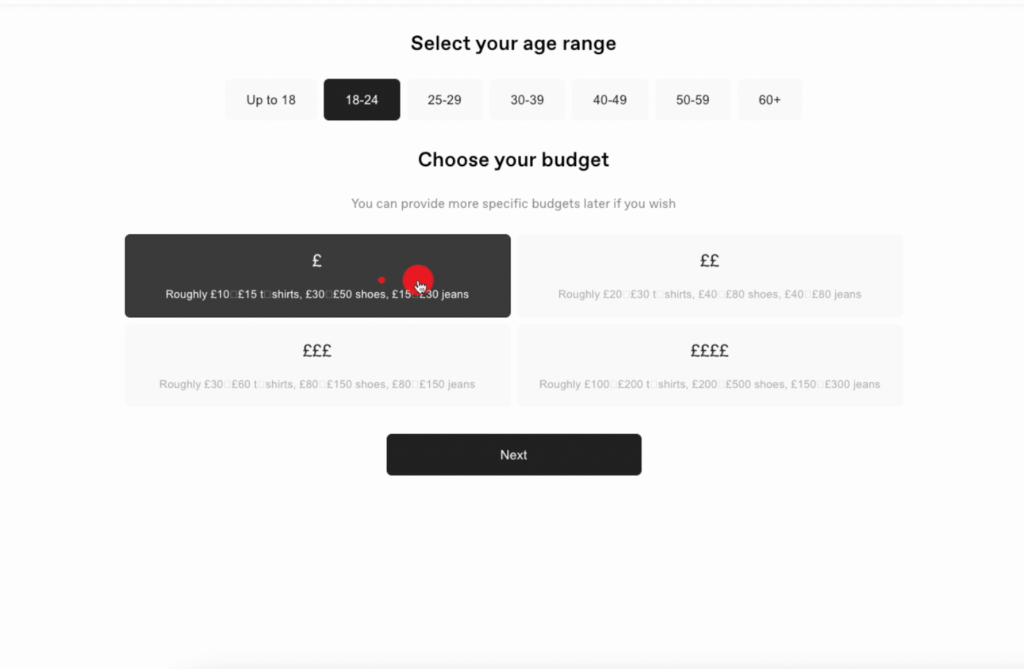
When designing your Growform multi-step form, arrange the questions to progressively gather more detailed information with each step. For example:
- Basic contact information: Name, email, company name
- Company details: Company size, industry
- Needs assessment: Current challenges, goals
- Budget and timeline: Budget range, implementation timeline
- Decision-making process: Are they the primary decision-maker? If not, who else is involved?
3. Analyze Needs and Pain Points
Understanding your lead’s needs and pain points lets you effectively position your product or service as the perfect solution, increasing the chances of conversion.
There are many ways to go about it, like:
Implement Social Listening
Social media listening involves tracking and analyzing online discussions about a brand, industry, or topic across social platforms. It includes five main types:
- Basic listening
- Deep listening
- Combined listening
- Competitive analysis
- Social media intelligence
For example, Tylenol used social listening to find that people with focus-intensive hobbies, like knitting, reported migraines, revealing a new customer segment for their pain relief products.
Social listening tools like Sprout Social, Brandwatch, and Hootsuite can monitor keywords, hashtags, and sentiment in real time. By analyzing common challenges and questions from your audience, you gain insights into their needs and pain points.
Offering Self-Assessment Tools
Self-assessment tools are interactive surveys that help prospects evaluate their needs and challenges, providing valuable data for your sales team. They engage prospects, support lead scoring, and enable personalized follow-up.
Adding self-assessments to your website or email campaigns can help score and qualify leads automatically.
Analyzing Content Engagement
Content engagement analysis provides valuable insights into prospects’ pain points and interests, aiding in lead qualification through:
- Topic Interest: Identifying which topics generate high engagement reveals what resonates most with your audience.
- Behavior Patterns: Metrics like time spent on the page, CTRs, and repeat visits identifies prospects actively looking for your solutions.
- Lead Scoring: Engagement metrics can score leads, as higher engagement often correlates with higher-quality leads likely to convert.
The easiest way to implement content engagement analysis is to use a tool like Google Analytics to track metrics such as time on page, bounce rates, and click-through rates for your content.
Additionally, ask these questions in your lead capture forms:
- “What are the top three challenges your business currently faces in [relevant area of your product/service]?”: to pinpoint specific issues the prospect is facing.
- “How are these challenges impacting your business operations or bottom line?”: to quantify the impact, revealing the urgency and potential value of addressing these problems.
4. Evaluate Lead Budget
Let’s talk money now.
Knowing your lead’s budget early on helps you determine if they’re a potential fit. Here’s how to approach this:
Gather Budget Insights During Form Completion
Customize your form to capture budget insights as your leads fill it out.
Our conditional logic feature lets you create complex combinations of conditions using AND/OR operators, enabling your forms to adapt and create different completion paths based on budget responses.
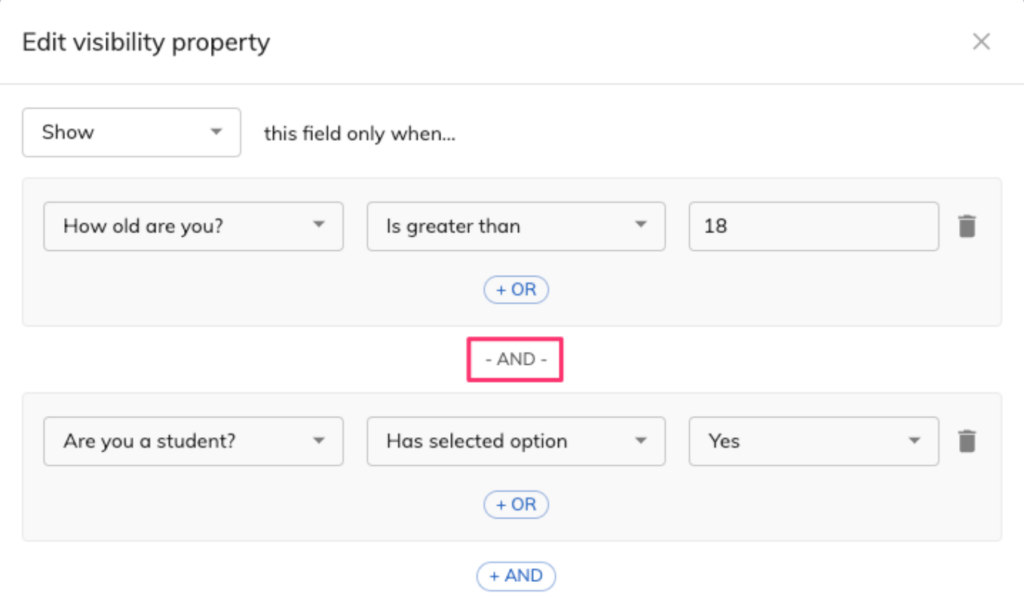
For example, if a user’s budget is too low, you could hide all subsequent steps and redirect the user to a different page to explain why the form can’t be completed now.
However, instead of dropping them, consider ask about their budget flexibility or other funding sources:
- “What’s the typical budget range for projects like this in your organization?” : Gauges the prospect’s budget expectations and alignment with your pricing without asking for a specific figure they might hesitate to disclose.
- “How does your company typically approach ROI calculations for investments in [relevant areas of your product/service]?” : Provides insight into their decision-making process regarding budgets and frames your solution’s value effectively.
Ask Them Directly
If you prefer not to ask about their budget in the form, contact your leads after form completion. Then, use the form’s information to send a personalized email, inquiring about their budget for solving their problem or implementing a solution.
Be straightforward but tactful in your approach.
5. Set a Timeline
Setting a timeline with your potential lead aligns your sales process with their decision-making cycle and resource allocation. Understanding their timeline helps you prioritize leads and tailor follow-ups to their urgency.
Use a CRM system to record and track all interactions and milestones. Then, include these key elements in your lead qualifying timeline:
- Initial Contact Date: Note the first interaction date with your lead.
- Buying Stage: Identify their current decision-making stage (e.g., awareness, consideration, decision).
- Urgency Level: Assess how urgently they need a solution.
- Decision Deadline: Determine their expected decision date.
- Budget Approval: Record anticipated budget approval date, if applicable.
- Potential Roadblocks: Note any factors that might impact their decision, focusing on addressing these.
- Implementation Timeline: Understand their planned timeline for implementation.
By aligning your timing with theirs, you’ll stay a step ahead.
To find out their timeline, ask:
- “What’s your ideal timeline for implementing this solution?” : Gauges the sales process timeframe and your prospect’s urgency.
- “Are there any upcoming events or deadlines we should be aware of?”: Identifies critical dates that may influence their decision and time your pitch.
- “How quickly do you need to see results?”: Understand the prospect’s expectations for outcomes to set realistic timelines.
6. Assess Decision-Making Role
To gauge whether or not to qualify a lead, ask about their role in the decision-making process. Here are some approaches:
Use a Lead Capture Form
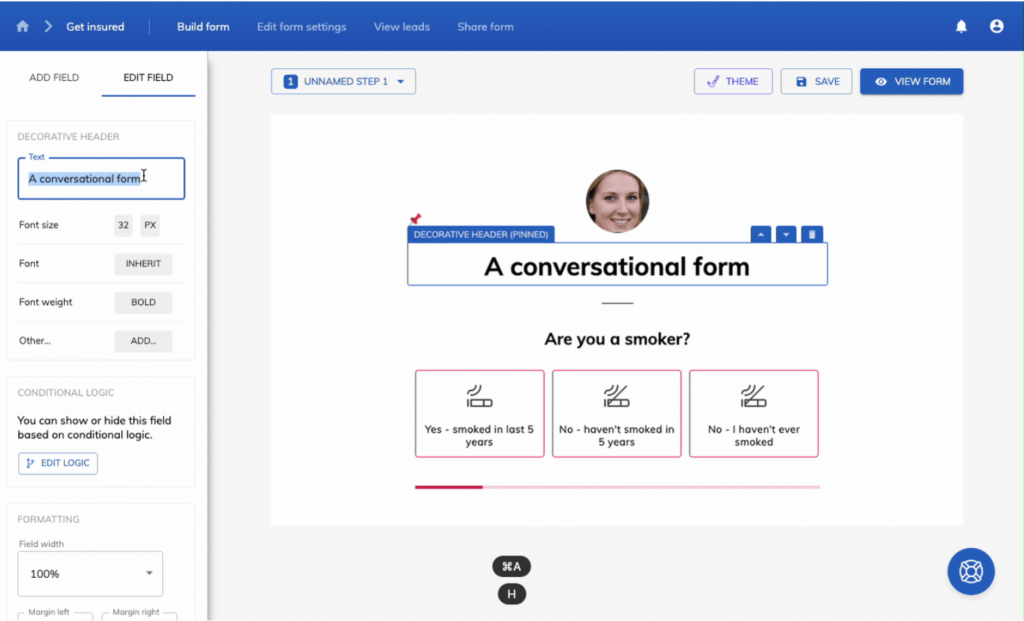
Add dropdown menus or multiple-choice questions about the person’s decision-making role to simplify responses. You can use conversational forms to create a natural dialogue and make the process feel more engaging.
Include categories like:
- Final decision maker
- Part of the decision-making team
- Influencer
- Researcher
- Other (please specify)
If you confirm that you’re speaking to the final decision-maker, you’ve hit a home run. They’ll have the power to reject or purchase your offerings and potentially shorten the sales cycle.
Ask Follow-Up Questions
If you don’t prefer forms, again, just ask directly through a follow-up call or email. Choose questions like:
- “What is your role in the decision-making process for this purchase?”: To figure out their level of authority and involvement.
- “Who else is involved in evaluating our solutions?”: To identify other key stakeholders and decision-makers in the process.
- “Can you share how you have made decisions like this in the past at your company?”: To get insight into their decision-making structure and how they may have influenced their company.
This helps you assess your lead’s qualification level and better understand their decision-making dynamics.
7. Score Your Leads
Now that you’ve got the full picture, it’s time to assign a score to each checkpoint.
Determine the importance of each criterion and allocate points accordingly, with higher scores for more significant indicators or lead quality.
For example, you can assign point values to different decision-making roles. A final decision maker could be awarded 10 points, while a researcher might receive 2 points.
This prioritizes leads based on their authority level, letting your sales teams focus on prospects with the most decision-making power.
Optimize Your Lead Qualification with Growform
A well-structured lead qualification process can maximize sales efficiency and conversion rates. Using a tool like Growform, you can create dynamic, conversational, multi-step forms that gather crucial information while keeping your leads nurtured throughout the process.
Ready to solidify your lead qualification? Start your 14-day free trial at Growform today.
Recent Posts
- Here Are the Best Google Forms Alternatives for More Efficient Data Collection
- MSP Lead Generation: The Best Strategies to Attract and Convert Clients
- 11 Essential Types of Forms for Boosting Lead Generation and Conversions
- We Present the Best Wufoo Alternatives for Creating High-Converting Forms
- We List 9 Landing Page Best Practices to Maximize Conversions
