Comment déclencher une balise lorsqu’un utilisateur appuie sur un certain bouton ?
You’ll need to complete our basic GTM container setup before starting this guide.
Table des matières
🎉 This guide is available in video form!
One of the most popular common use-cases for Google Tag Manager with Growform customers is to fire a tag when a user presses a certain button.
By doing this, it’s possible to add users to retargeting audiences (with services like Facebook ads) or fire a goal conversion – even if they haven’t completed your form.
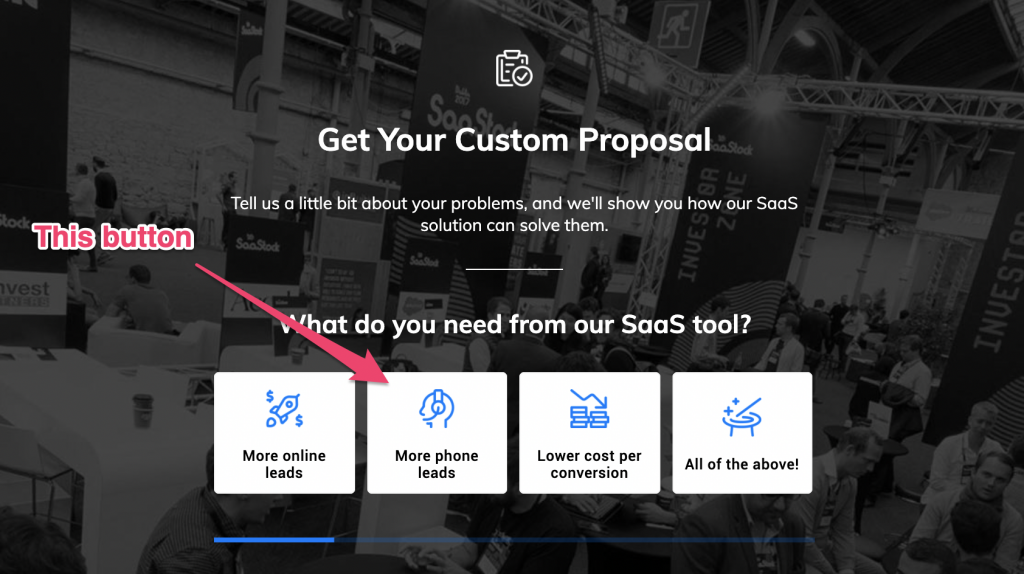
In this example, let’s say we want to fire a Pinterest tag when users hit the “More phone leads” button:

1 – Identify the button you wish to target
Take note of the text on the button and its position: the text on this button is “More phone leads“, and it is the 2nd button on the list.
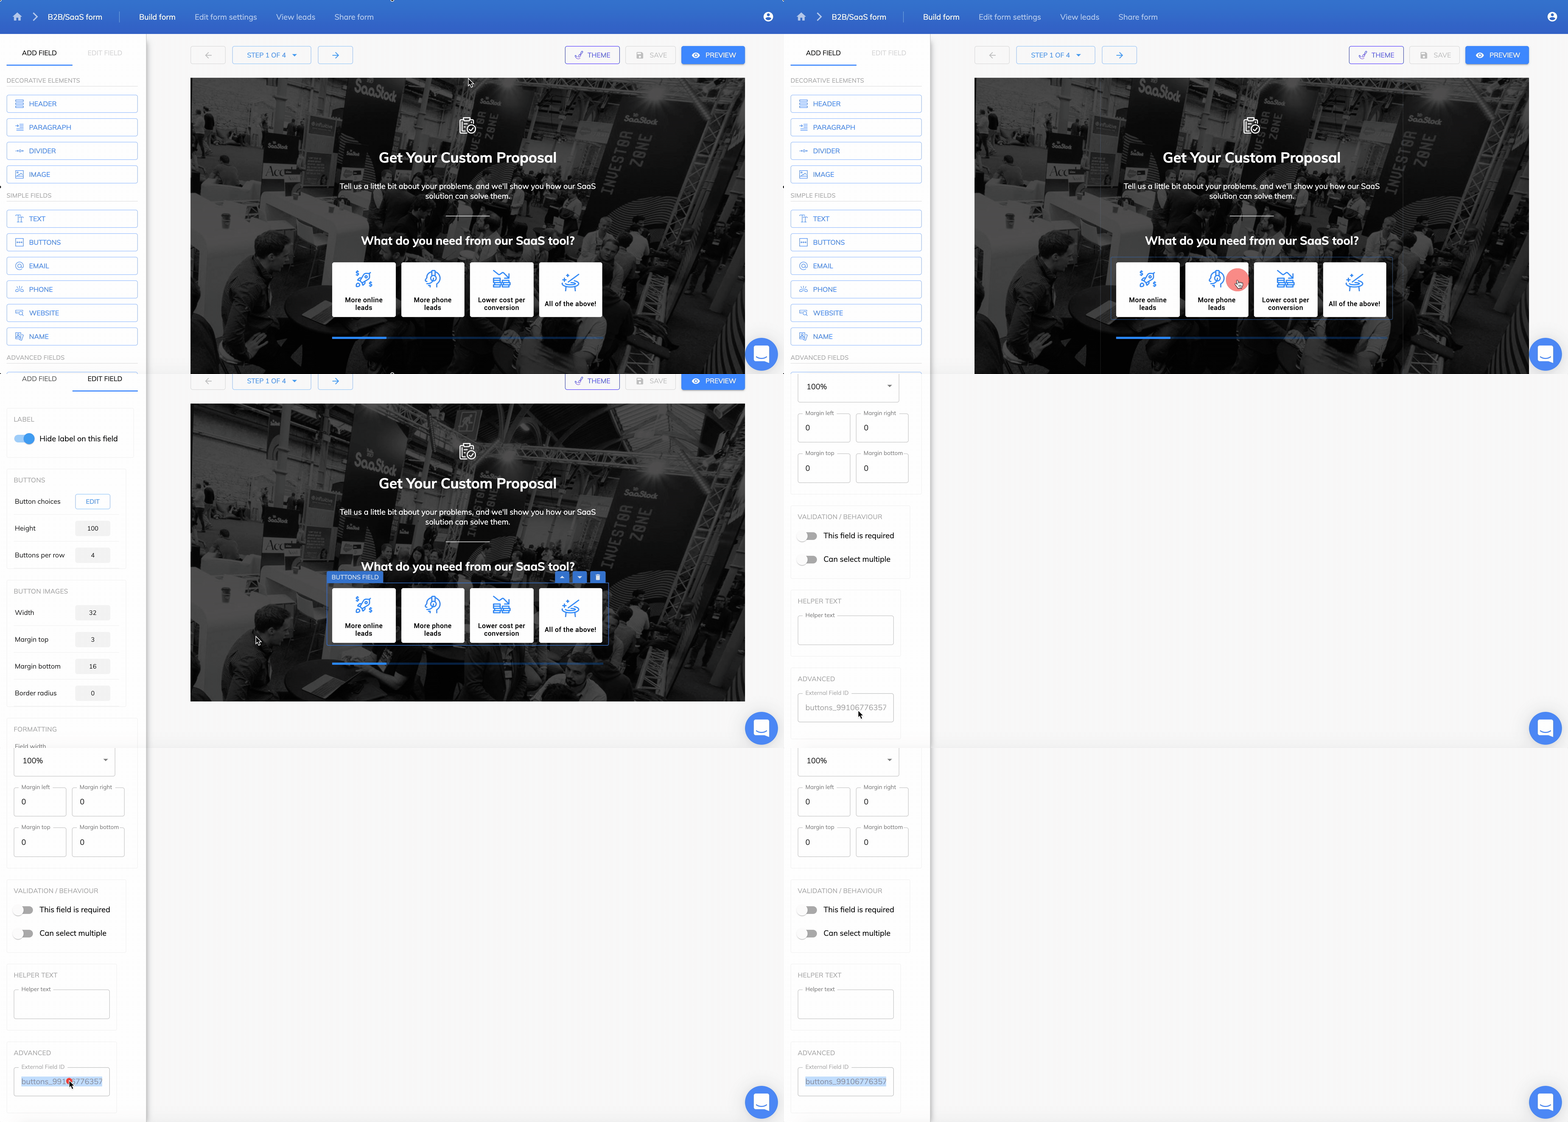
Then, identify the field ID: select the buttons in the Growform builder, and scroll down, we’ll see the external field ID for the button set is “buttons_99106776357703“:

Knowing that, we now just need to look out for an event matching the following details in the parent container:
| eventName | growformIframe.growformButtonClicked |
| buttonText | More phone leads |
| buttonId | 2 |
| fieldId | buttons_99106776357703 |
What’s happening here is as follows: The child container automatically sends an event called “growformButtonClicked” whenever a button is clicked, and adds information including the button text and button ID. We’ll use this to build our trigger in the next step.
If that doesn’t make much sense, don’t worry at this point!
2 – Create a trigger in the parent container
Open your parent container and navigate to “Triggers”.
Find out trigger called “Button clicked“.
This trigger will fire whenever the parent container receives an event from the child container called “growformIframe.growformButtonClicked”.
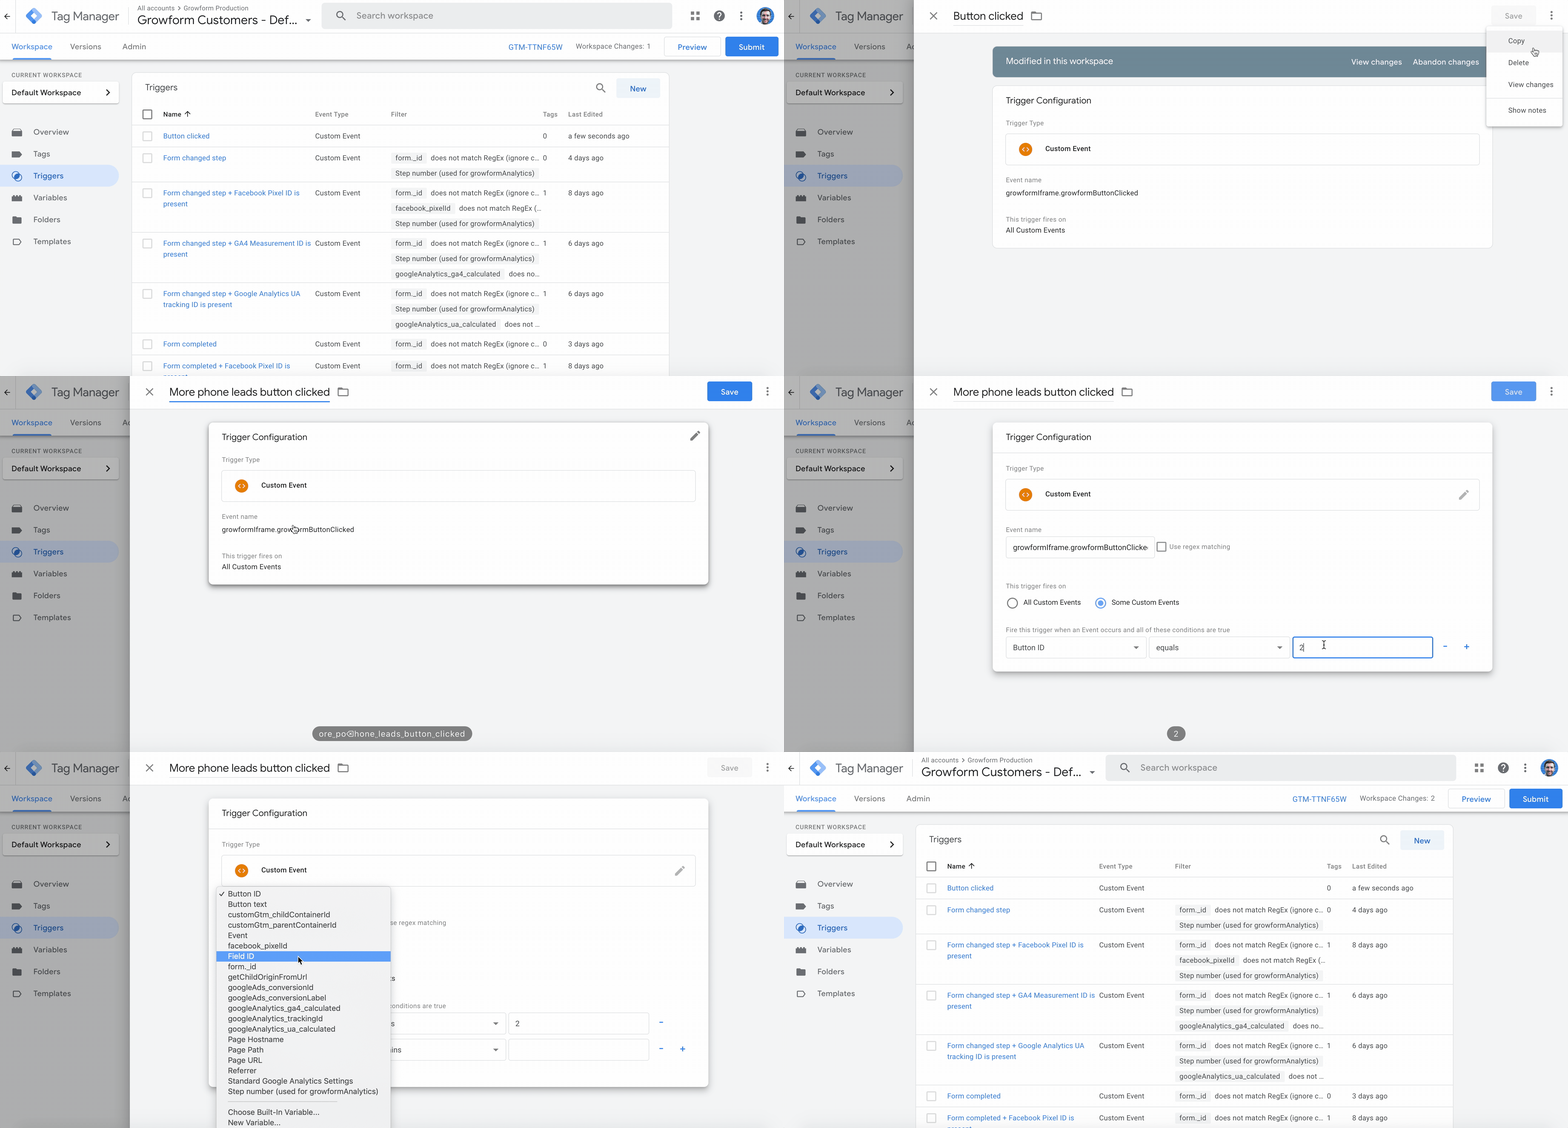
This is a useful place to start, but will fire on all button clicks – so open the trigger, click the “three dots” menu in the top-right corner to copy it… and create a copy called “Clicked more leads button”.
For this example, add the following settings under “some custom events” to target this specific button:
- fieldId equals buttons_99106776357703
- buttonId equals 2
(You could alternatively target by the text on the button, but this approach should be a little clearer more maintainable)
Here’s a screen recording of this step:

That’s done – now we have a trigger in the parent container that will fire when only our target button is clicked!
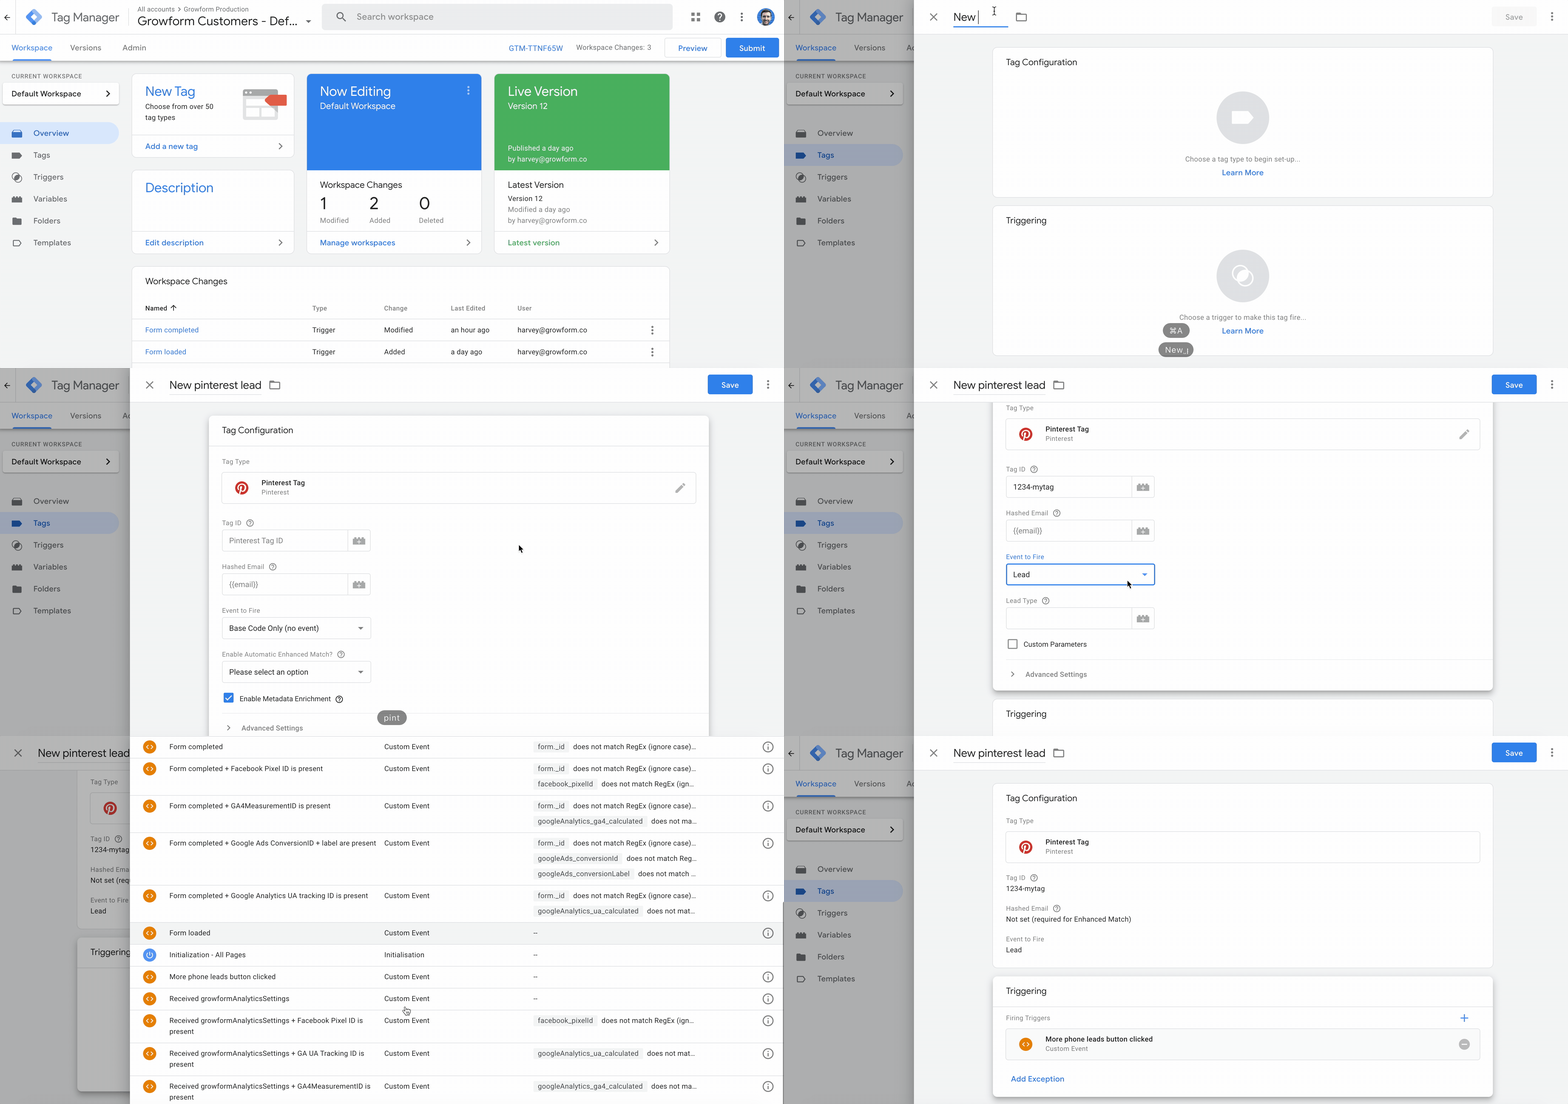
3 – Finally, create your tag, and fire it on your trigger
This is the easy bit – simply create your tag in the parent container, and set it to fire in response to the trigger you created in step 4:

Make sure both containers are saved + published… and you now have a pixel that fires in the nice, reliable parent container when a button is clicked in the child container!
Need help with custom GTM containers? Our team are experienced in advanced tracking & tagging and able to help via online chat within your account.
Recent Posts
- Nous listons 9 pratiques d’excellence en matière de pages d’atterrissage pour maximiser les conversions
- Nous passons en revue les meilleurs outils de qualification des prospects pour identifier les personnes à fort potentiel.
- Nous décomposons 5 exemples de pages d’atterrissage à aimant de plomb (plus des conseils pratiques)
- Nos meilleurs choix de sociétés de génération de leads immobiliers pour booster votre activité
- Comment envoyer des conversions à Facebook/Meta via l’API de conversion (CAPI)
Categories
- Conception de formulaires en plusieurs étapes
- Conception de la forme
- Conformité
- Convertri
- CRO
- Formulaire de confiance
- Génération de leads
- Google Tag Manager
- Hubspot
- Immobilier
- Intégration
- Marketing
- Non classifié(e)
- Offres spéciales de génération de leads
- Outils
- Prospection
- Tutoriels Unbounce
- Unbounce
- Utilisation de growform
